


Justine Skirt | Ready to Sew
My first skirt with buttons! Well, my first everything with buttons.
Ever since I started my sewing journey, I have always been afraid of two things: buttons and zippers. I have placed buttons and zippers in smaller projects like pouches or hand towels, but never in garment. It’s one of those things that when you ready about, it just seems so complicated and challenging, it has driven me away from working on a pattern that has either or.
But I have been seeing all these cool skirts lately at stores and I really wanted one. Like… REALLY. During our last trip to Hong Kong, I kept seeing girls wearing these linen skirts that I decided I wanted one. Instead of making one, I thought I could go to Uniqlo and buy myself one. They have such cute skirts there. But when I got there, they had none in my size… we visited several Uniqlo’s and other local stores and none of them had my size. Times likes this makes me feel so gigantic in Asia, and I’m a regular size 8 or 10 US only! But I guess still larger than the “typical” Asian girl.
It was either come back to the US Uniqlo and buy one, or just come back and conquer my fear of buttons and sew myself a skirt. I didn’t have any patterns in queue to sew so it seem like a new challenge was meant to be in my sewing journey. I had pinned the Justine Skirt pattern by Ready to Sew a long time ago thinking one day I’ll make it. It looked so cute and best of all, it was FREE! How cute you say? Well, check out all these Instagram posts of the skirt and see for yourself! I especially like the ones posted by @pippyeve, @hellomister, and @twodogs_and_a_sewingmachine (heck yeah NKOTB!).
The pattern is free and you don’t need to sign up or anything to get it. Just read the article and you’ll find the zip file at the bottom of the page. The pattern is very simple too, 3 big panels, pocket facing and lining, and waistband. There’s no elastic to worry about, just have in hand 9 buttons you’d like to use for the skirt closure. I used these 3/4” buttons that come in packs of 5 for $0.99 I got at the local fabric store, good and economical for first time button sewists. Oh, and you’ll need some lightweight interfacing for the waistband and the sides where the buttons and buttonhole will be placed. And that’s it!
Cut up the pieces as directed in the diagrams and apply the interfacing. Fold the fabric on both front panels and press. Sew all panels together and gather at top. Fold waistband in half and attach it to the skirt panels. Make the buttonholes and sew the buttons. finally, hem the skirt. Such easy steps! I was confident about all the steps, as I’ve performed those before, except, as mentioned before - the buttons and buttonholes. So after sewing all the panels and the waistband, I walked away and didn’t touch the skirt for a couple of days because I was scared and frustrated. I wasn’t ready to face it yet. The weekend came and went and here I was sitting on Monday afternoon in front of the sewing machine, deciding if it was time to face my fears.
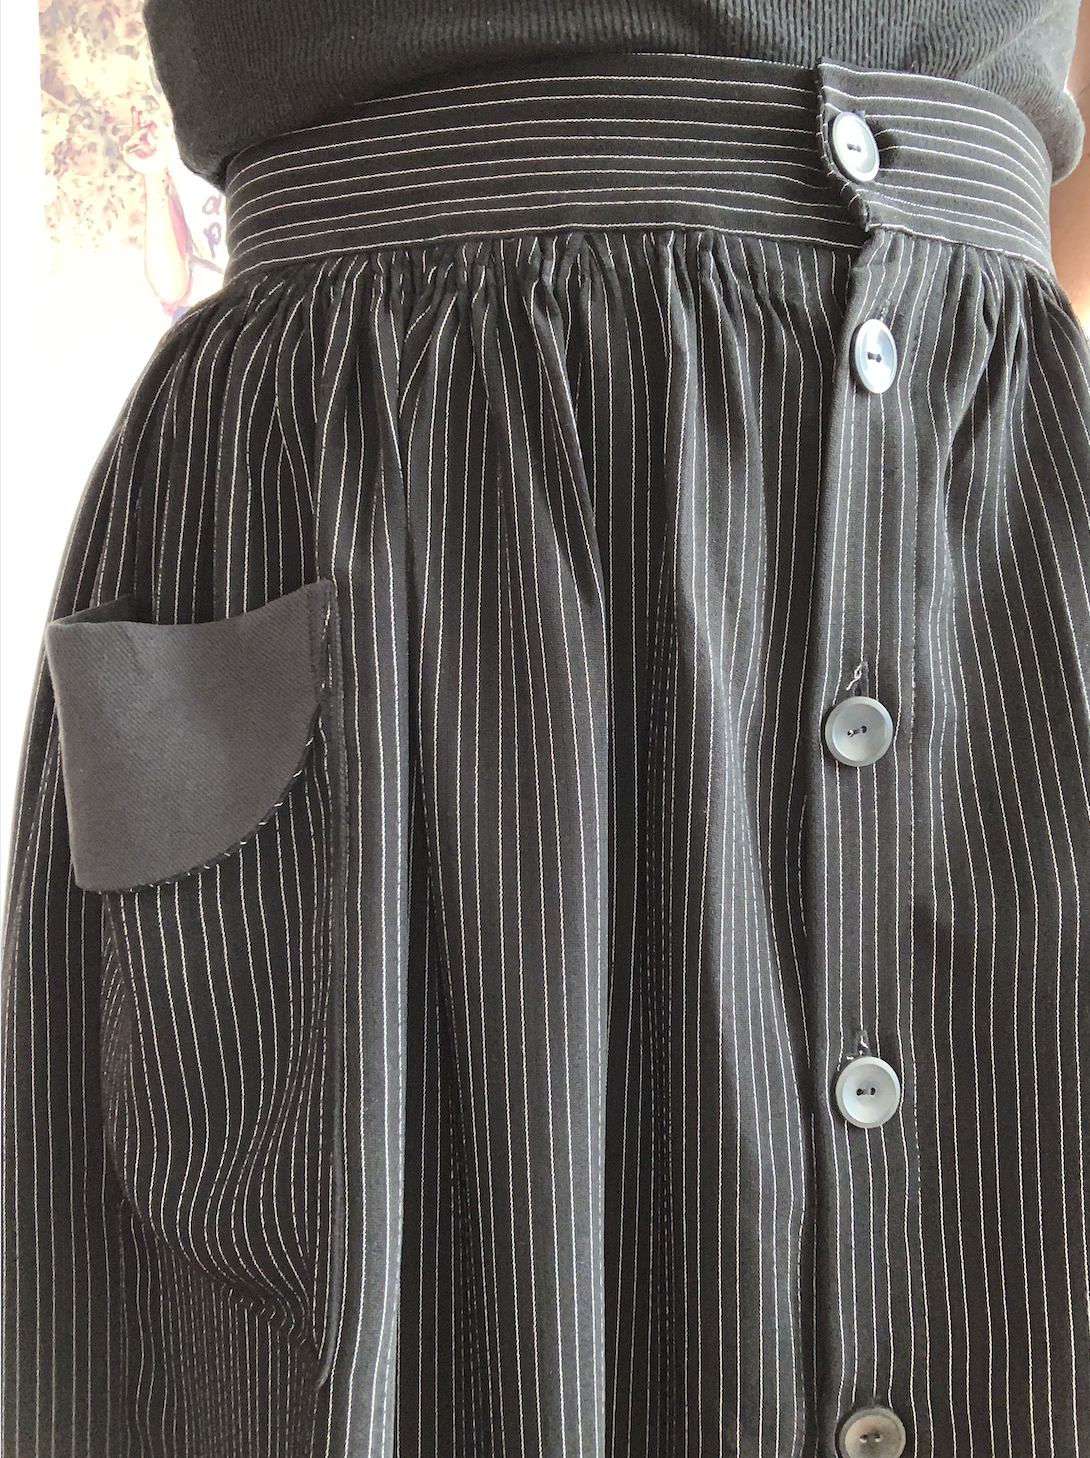
I don’t know why I was so fearful of the buttonholes. All I had to do was measure the length of the skirt and divide by 9 (for the # of buttons). It came out to be about 3.5”, which means that’s the space in between each button. But remember to consider the size of the buttons. Since mine were 3/4” in diameter, that meant that give or take each space between the end of a button and the start of the next button should be about 2.75” to 3”. I decided to go with 3” to make things easier. Surely not a big difference if at the end of the skirt I skip the 9th button. So I start from the top, one button on the waistband, then first button on the main skirt was placed 0.5” from waistband, then 3” in between each button.
Since my machine has the magical buttonhole preset, all I had to do is put the buttonhole foot, select the type I wanted, and press the button. Then my little machine just makes magic happen. Repeated that 8 times and I’ve got all my buttonholes. I also used my sewing machine to sew the buttons on, using the button foot and the zigzag stitch set to zero length space. A few back and forth’s and that’s it! For my buttons, I like to bring the final stitch thread to the backside and tie two knots and cut the extra thread. I did make a boo boo and made the waistband buttonhole vertical instead of horizontal. But it’s ok, it still works!
The fabric I used for this skirt is a poly mix I got from DIscountFabrics in Oakland. When I saw the fabric I knew exactly it was meant to be made into a skirt or a jumpsuit. It’s got a good weight and flows marvelously. But because it drapes a lot, the fabric runs quite a bit, which means it can be a bit hard to hold and sew. For the pocket lining, I used a contrasting black silk linen that I had tiny pieces left from the Wiksten Haori I last made. Instead of trashing the bits, I kept it because they were big enough to be pockets in some other garment. I’m glad I saved it because it gives the Justine Skirt just a small unique touch.
Now that I’ve made my first buttonhole skirt, I feel very motivated into looking at what other patterns I can use with buttons! And I’m already planning one more Justine skirt made from Linen, just like the Uniqlo ones! So, if you’ve ever been scared of sewing buttonholes, I hope my story encourages you to try it out. Remember - if you set your mind to it, you can do it! If I can, you can too!


