


Jumpsuit D0865 | Simplicity
Wow, first of all - Happy New Year - welcome to 2020! I hope you all had a great start to the new year and that your holiday celebrations were filled with loved ones and tons of food!
My holiday time was so hectic because it was full of craft shows, which meant tons of sewing, packaging, and attending events. I must have made more than 100 pair of joggers just in the month of December! It’s tons of fun though, talking to people, sharing my creative process, and meeting other local makers. I’ve definitely made a few friends along the way and am so grateful I have the opportunity to be in this maker space.
My last even of 2019 was on December 15th, which means that I had some time to sew myself something for the holidays. I was invited by a good friend to a Facebook holiday party and I was so excited about it! It was a theme party - Game of Thrones, and even though I don’t watch that show, I have seen bits and pieces of what the fashion of that show is. I’ve never been to one of the Facebook parties so this was a big deal for me! I’ve seen photos of their holiday parties and they go ALL OUT. So, what was I to wear to this event?

Simplicity D0865
Jumpsuit
I went window shopping for the perfect outfit, but honestly - everything I saw was not impressing me. This has been happening to me actually since I started sewing. It’s almost like I don’t know what my “style” is anymore on ready to wear clothing, so every time I’m at the store, I feel so lost. Do any of you have the same problem?
So I came home and just went through what I had in my closet. And of course I don’t have much for company party attires because I haven’t had a job for 2 years and even before that, my company parties were all super casual (jeans were actually a good option). I decided to then look at my pattern stash, and this pattern immediately popped up. I had purchased this Simplicity D0865 jumpsuit pattern when I first started sewing 2 years ago. I remember getting it at Joann’s thinking to myself that one day I will be comfortable enough to sew something this complicated. But honestly, I got it because aside from thinking the jumpsuit was nice, I really like the flower wall in the background is so beautiful! So that’s what originally caught my eye.
I thought this pattern could work. Even though it wasn’t a Game of Thrones theme, it was still cool and if I added a shiny belt, I might be able to blend in. Sure, having a cape could top off things, but I wanted to make something that I could wear again. I don’t think I can pull off wearing a cape around the city without people doing a double take. HA!
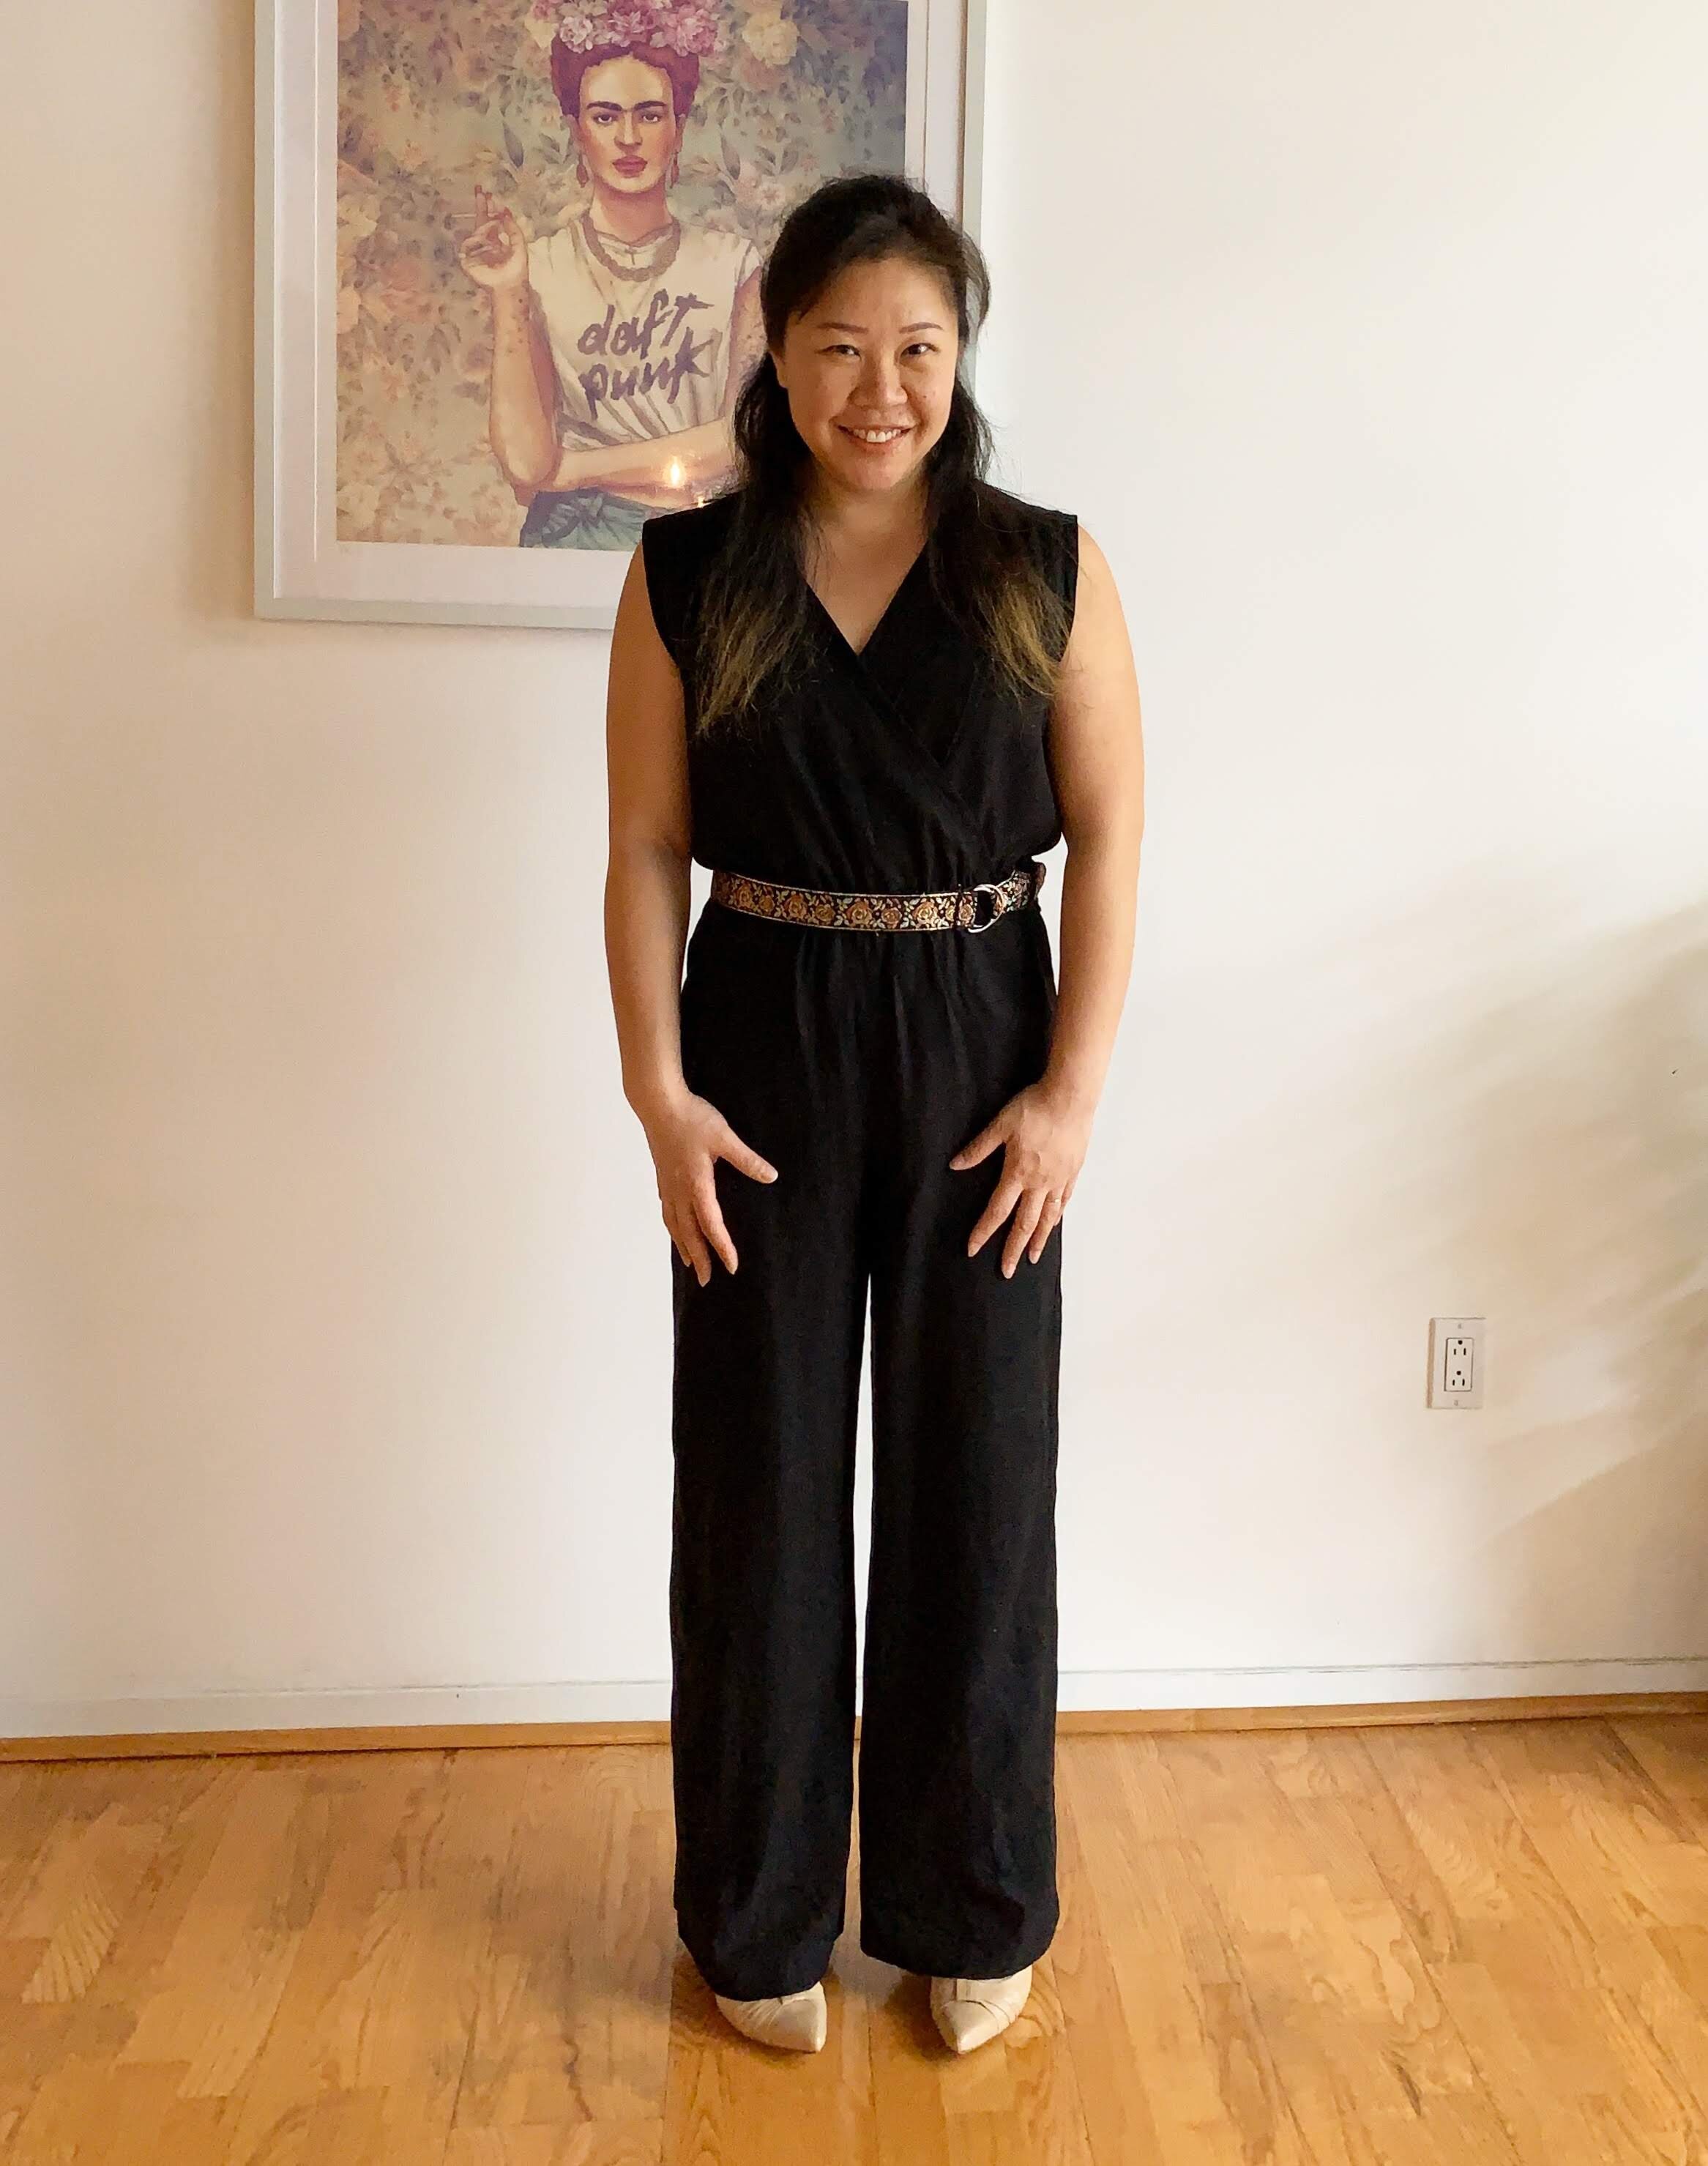
I used a deadstock rayon twill fabric I got from StoneMountain in Berkeley and it was the perfect fabric for this jumpsuit. As for the belt, I had a shiny belt in my closet that I purchased many many years ago at Urban Outfitters (I think I might have been in college still). So now the question was, can I really make this jumpsuit?
When I sent to open up the pattern, I realized that the one I got was not in my size range. What?! Based on my measurements (40-35-40), I was size 18, but the pattern I got only went up to size 14. What am I going to do? I freaked out - I was only a few days away from the party, so I had no time to waste. I thought of going to Joann’s and get the right size pattern, but like I said, I had NO TIME TO WASTE! I went online and searched for how to grade a pattern, and I came upon this really easy-to-follow tutorial from Itch-to-Stitch and it said that this technique could apply to Simplicity patterns because they use evenly graded sizes. Woo-hoo Score! Off I went and here are some pictures of my process to make from 14 to 18 on top and 16 on bottom:


You can see that on the top, I graded to size 18 on shoulders and armholes, and towards the waist, i graded it to size 16. This is because my pants were going to be graded size 16, as that was my size based on my waist and hips measurement. Although, none of this will really matter later during my process. But it was good that I learn how to do this - very handful in future projects!
I went ahead and followed all instructions to the dot, like I always do, but then I got really confused around the pockets, so I just went ahead and winged it. Below pictures are of how my pockets came out to be - I’m not sure if I did what the pattern directions instructed for, but this was my interpretation: I serged the seams and then did a topstitch, and in the pocket section, I separated the pocket facings so the topstitch doesn’t touch the pockets at all.


Everything else was pretty easy to follow. Although I should mention also that the waistband part was a bit tricky, try folding 1/4” on 3 layers of fabric and you’ll see what I’m talking about. Also, the other change I made to the suit was the top bias binding. Instead of folding the bias the french way, I did it the traditional way (showing the bias binding) to give it a bit more structure.
Now it was time to wear this, I was sooo excited! I put it on and wear it with the belt, and what happened? The jumpsuit was TOO BIG!!! I was happy because I realized I was able to sew a jumpsuit, something I thought was a whole different level of complexity, and I did it! But I was bummed that my grading was all for nothing. Honestly, I think I could have done the size 14 and it would have fit me right. Unfortunately I have no pictures of how big the jumpsuit fit me, which is a bummer - I really wanted to show the before and after. Even though the pattern has finished garment measurements, I wasn’t sure I should follow that because what if the design was supposed to have that much ease? I haven’t sewn enough Simplicity patterns to know how their patterns fit me. Actually, knowing what size to sew remains one of my many challenges in sewing.
So, what did I do? I stood in front of the mirror and pinched both sides at the waist and was sloppy at measuring. Instead of removing fabric little by little, I went ahead and chopped 2 inches on each side because it really felt that much bigger. I undid the whole thing, chopped, and sewed it all back up again. Then tried it on… and NOOOOOOOO! it’s now too snug on the hips! The pockets were sticking out because it was thaaaaat tight.
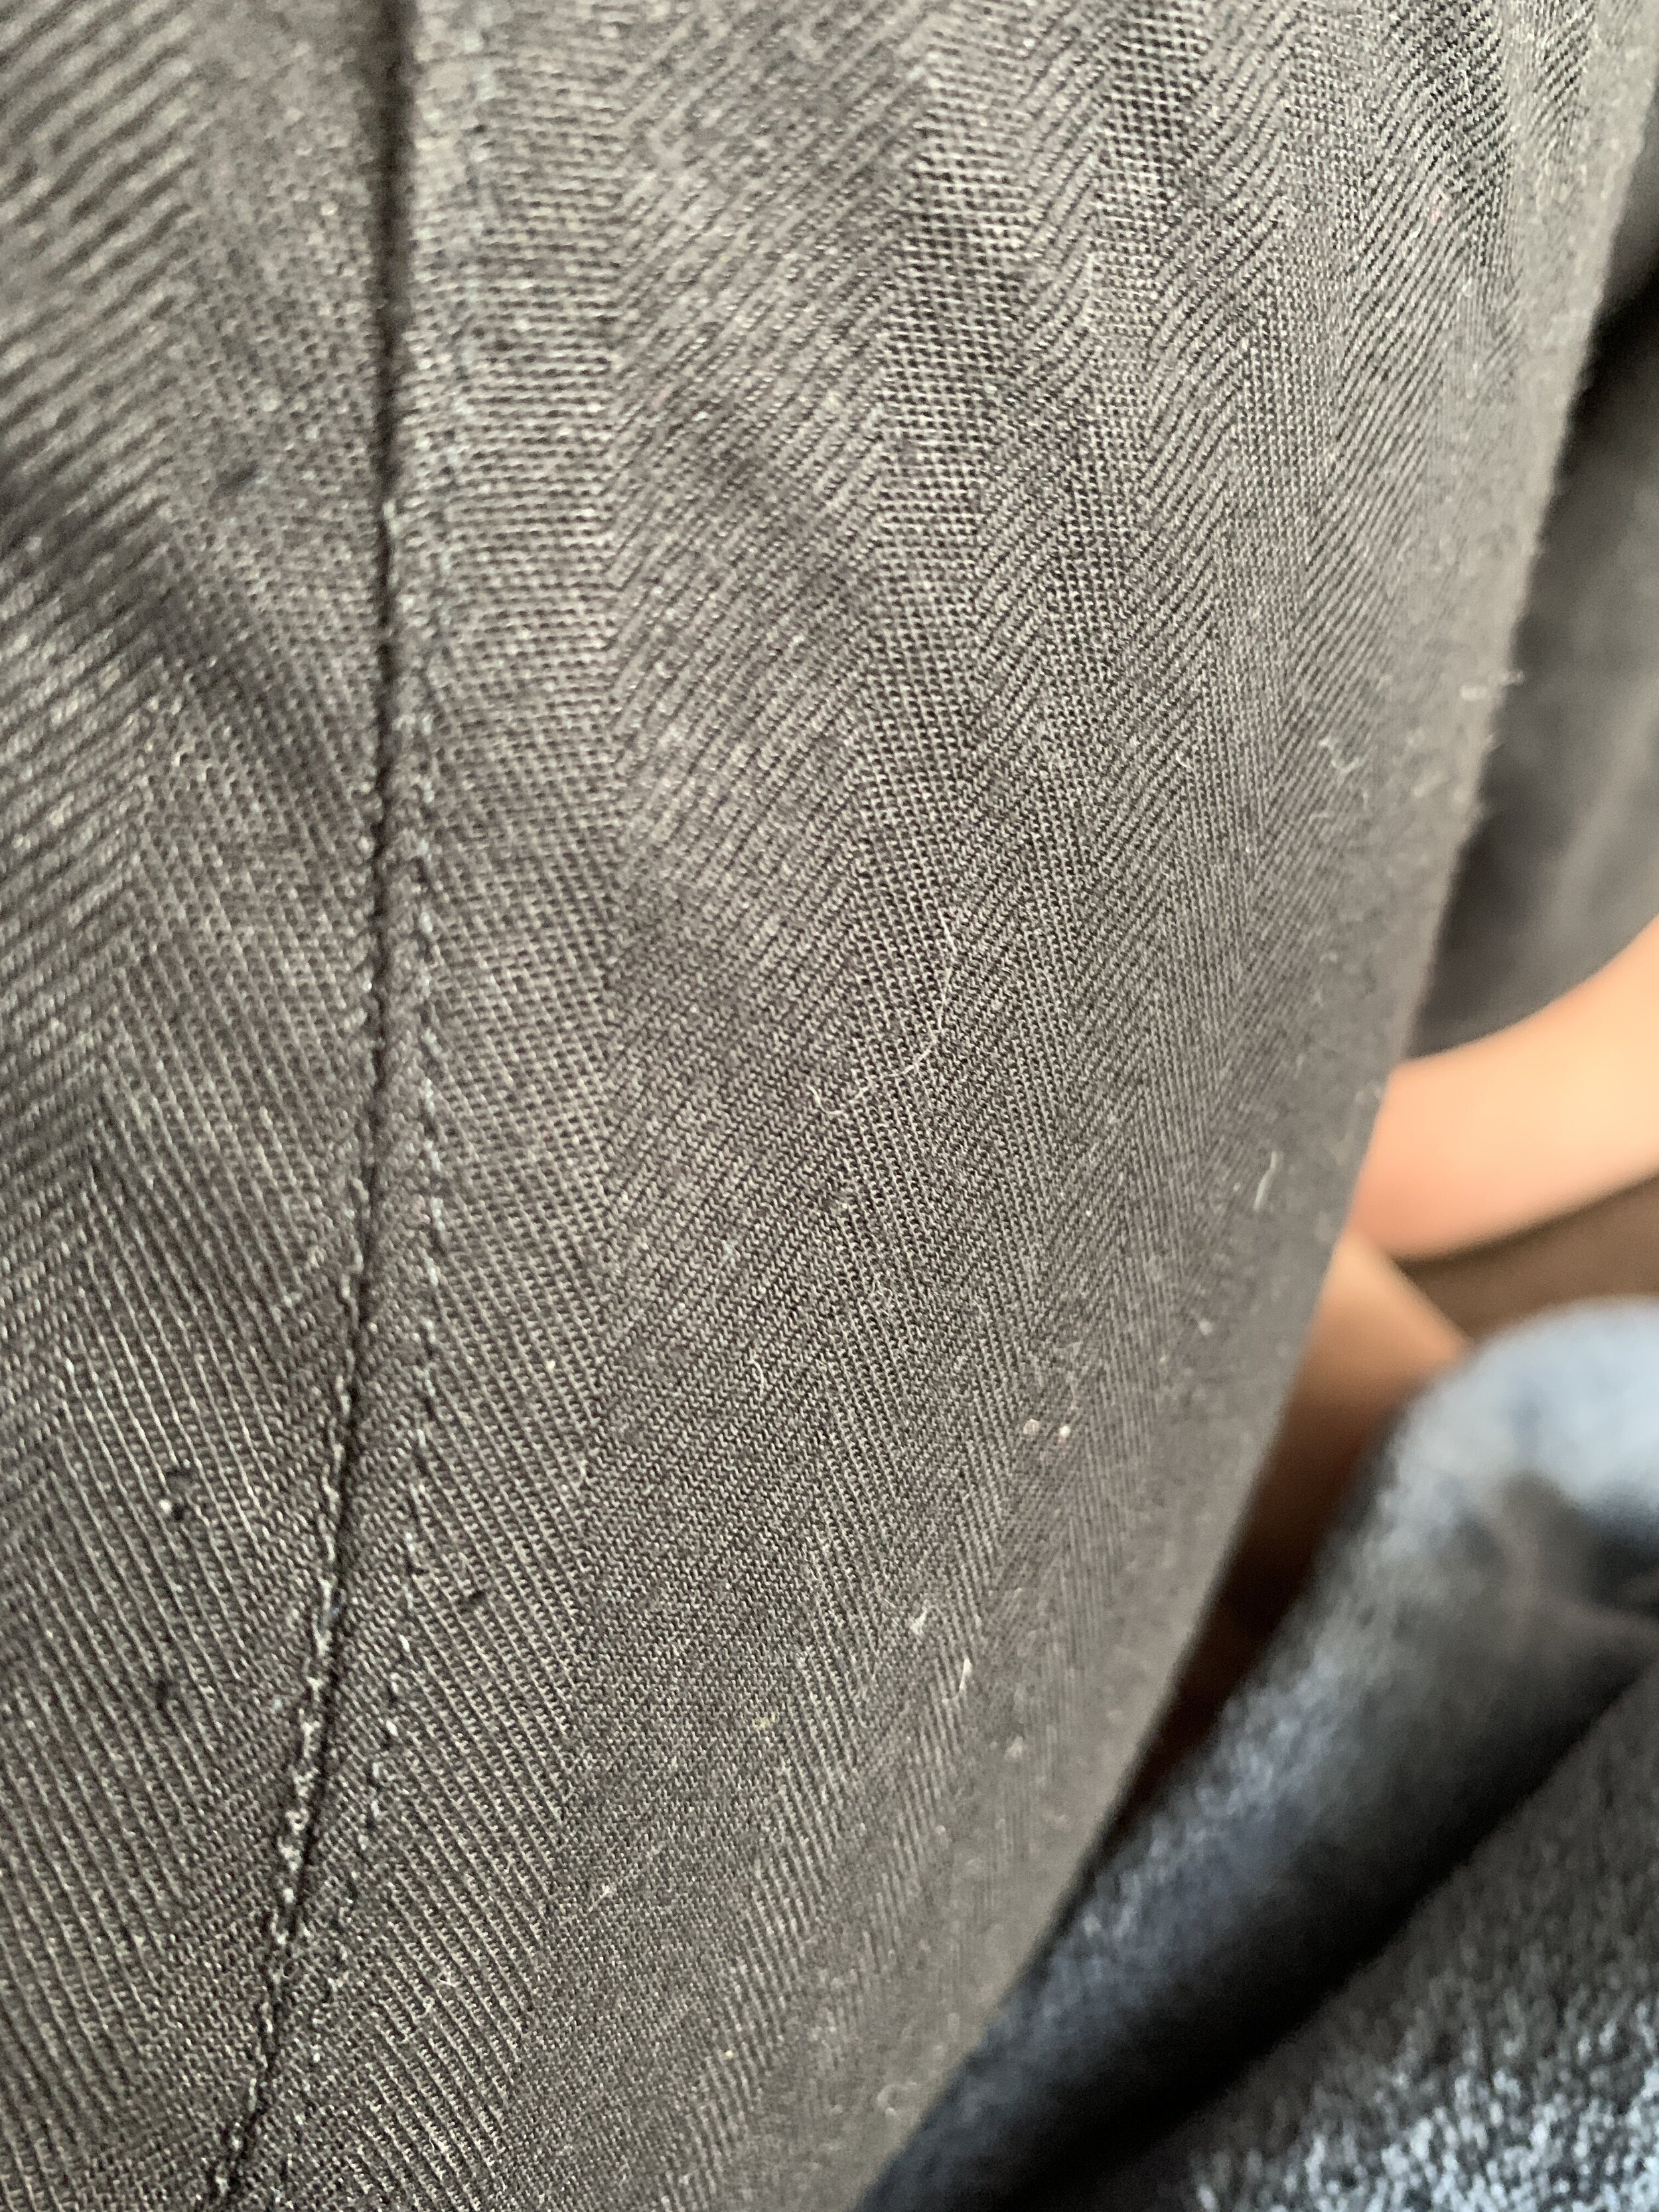
Freaking out, I was about to cry. I have ruined a good jumpsuit all because I was careless. Why???????????? My brain went immediately into fix mode, like I always do with everything else in my life, which honestly can be a problem sometimes! I look at the seams to see what I can do, and thankfully I followed the instructions and had 5/8” on each side for seam allowance. Took stitches out and then sewed right on the line where the serger seam is, give or take. But the downside is that there are areas where you can see the serger threads (pics below). But honestly, you need to zoom in the seams to actually see that, and hopefully people will not be putting their eyes 2 inches away from my hips. :) At least I was able to save the jumpsuit and make it wearable.

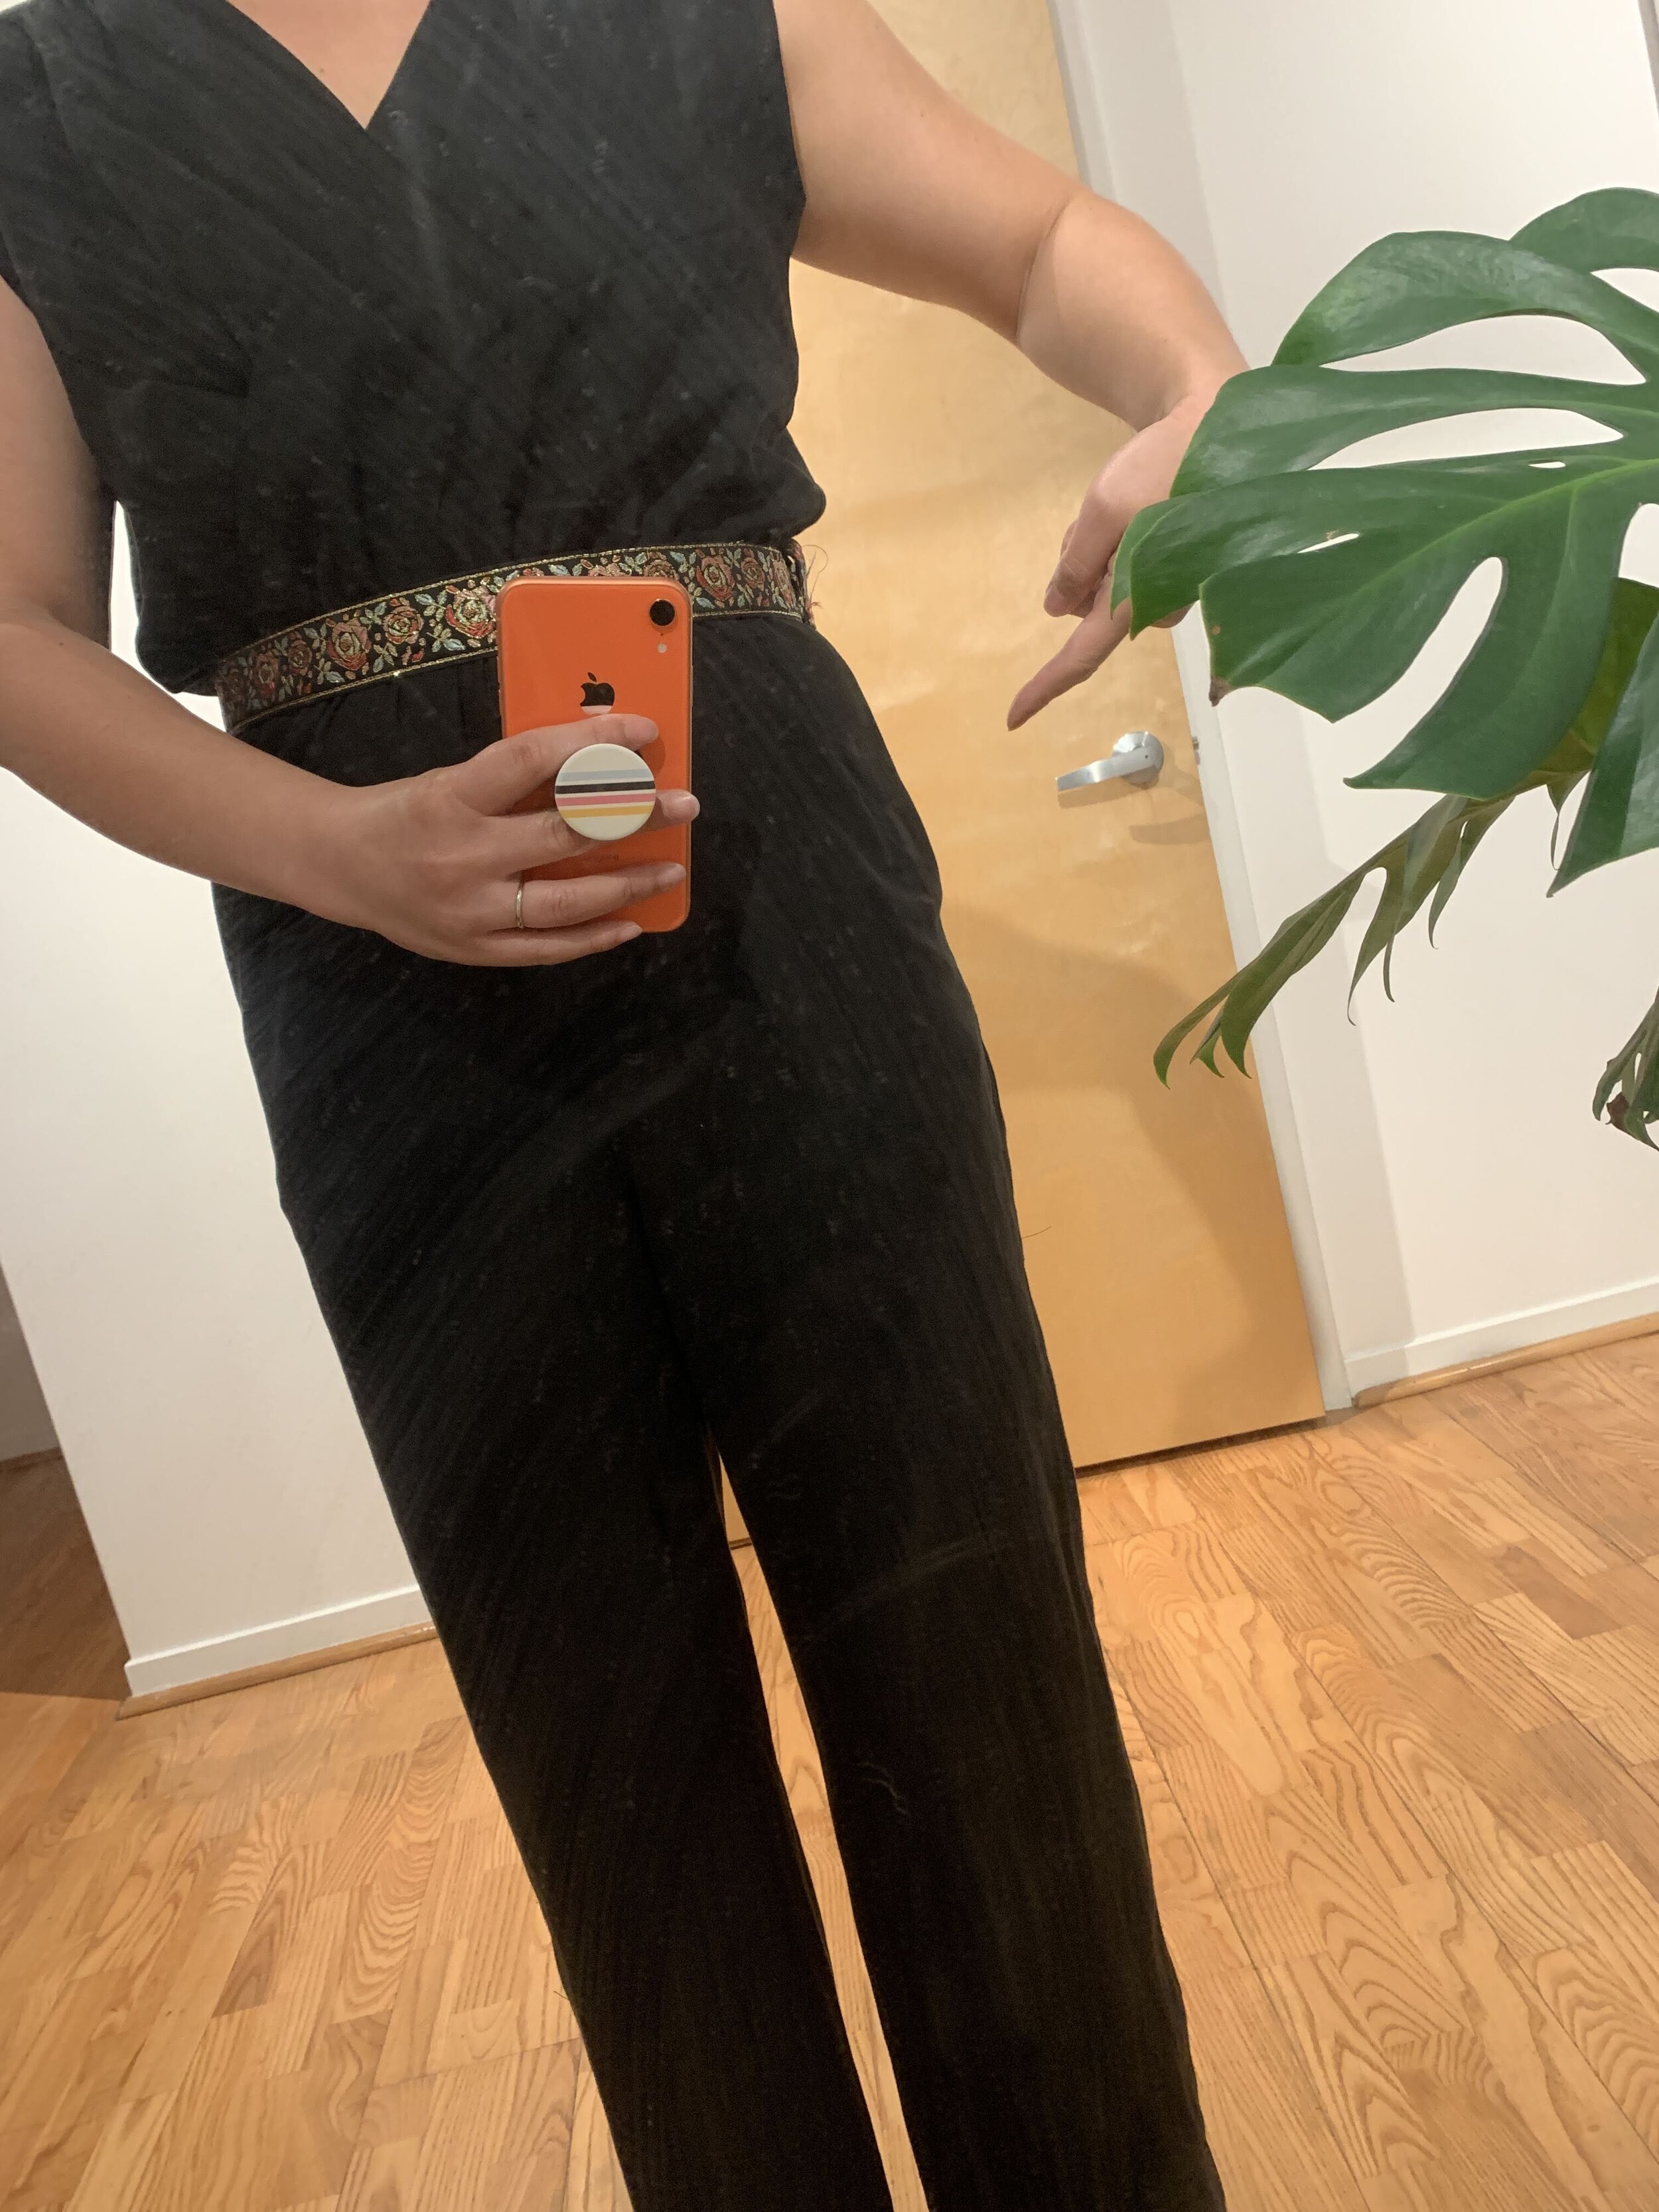
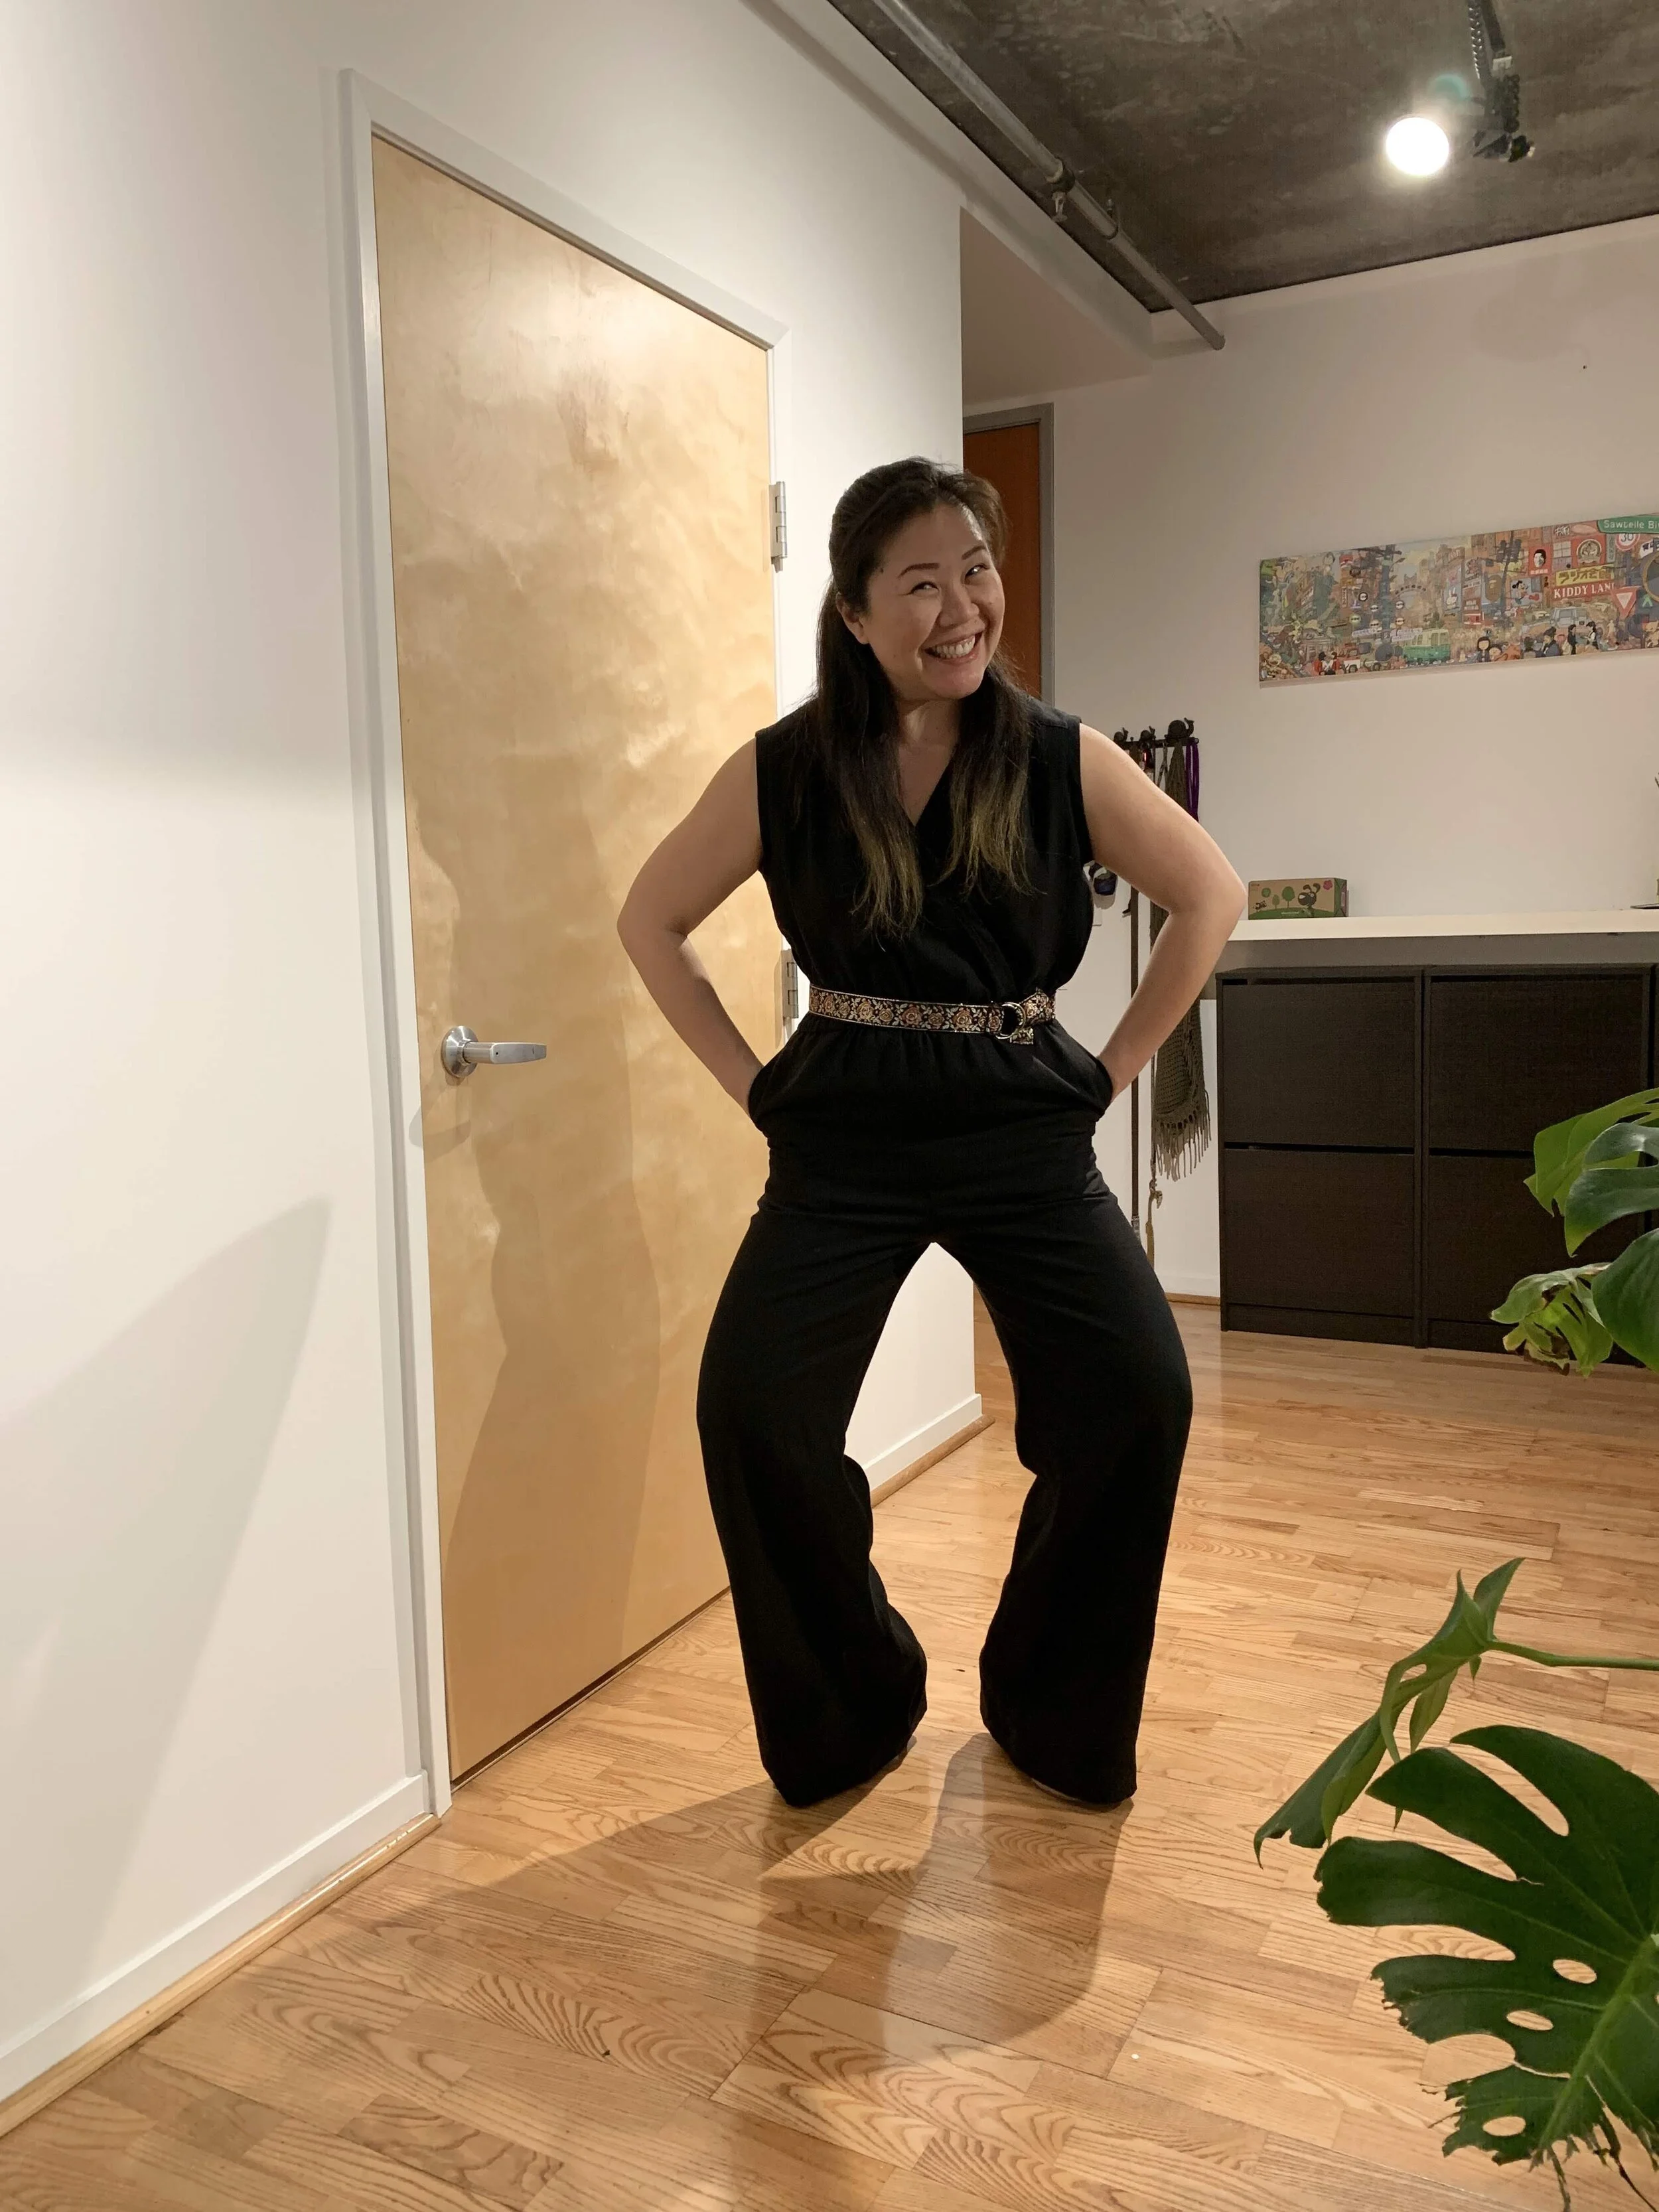
The result? A more relaxed look at the hips, although still a bit tight for my liking. But it did the trick as it looked much better.

The true test of how successful this fix was will be when I put this jumpsuit in the washer. Fingers crossed the seams stay put and don’t fray out. Wish me luck!
Lessons learned?
Always challenge yourself to the next level. If you don’t challenge, you don’t learn. If you don’t learn, you don’t grow.
If you don’t know what size to make, always size up. You can always make the piece smaller, but not bigger!
Always be conservative when sizing down. Again, if you chop too much first time around, you can’t take it back! I’ve read somewhere that it’s a good idea to decrease by 1/2”, baste and try on. Continue until you’re satisfied with the fit.
Making mistakes is ok, or so I tell myself. I have to, otherwise I’d be crying every night. HA!
If you’re wondering if I made this on time for that Facebook holiday party - the answer is NO. Actually, I ended up not going to the party because I got the flu! So I was in bed with wipes and hot tea binge watching TV shows when I should have been partying it up. But no worries, I did end up wearing this to my husband’s holiday party and it was very comfortable! Even got compliments (but they didn’t know I sew this myself). And I will be wearing it so much more too because I can dress it up or down.
Until next time!

